One Code Base (React Native) to Rule Them All
A few days ago, Evan Bacon posted the link to his React Day Berlin video about "Build It Once with Expo for Web". You really need to watch that video.
DEMO: https://ui-kitten-web.netlify.com/
Expo Demo: https://expo.io/@calendee/ui-kitten-expo-demo
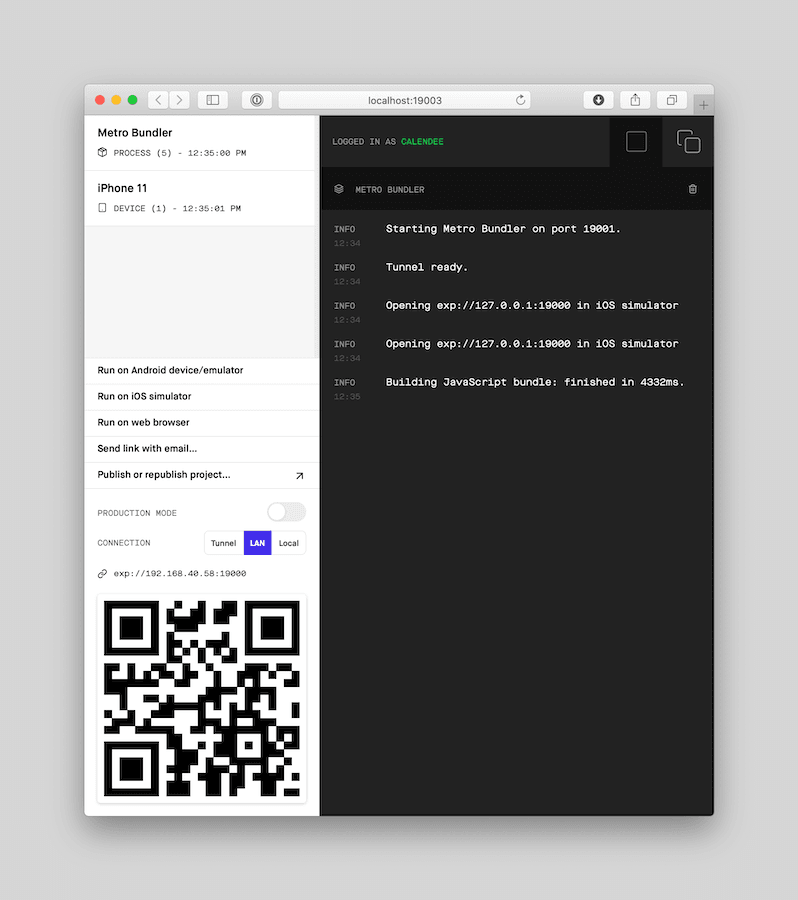
You can scan this QR code to open the demo app in Expo

Correction: In the video, I indicate you can't develop for mobile and web at the same time because of the different bundlers. This is actuall not true. Simple run expo start to get the bundler and dashboard running for mobile. Then, in another terminal, run`yarn web`. Another dashboard will open in your browser. The two will not conflict with each other. However, you have to be careful to not accidentally click the "Run in iOS Simulator" or scan the QR code for the dashboard that opened for yarn web. I'd suggest just closing it to avoid any confusion.
Evan demos building a "universal" app across 6 different platforms. With no code changes, you can use React Native code to support iOS, Android, desktop browsers, and several OSes( Windows, Mac, Linux) via an Electron App.
I've really been interested in React Native for Web, but I haven't wanted to deal with all the complexity of setting it up. It sure looks like Expo for Web has taken all the pain out of converting a React Native app into a cross platform app.
I've also been very interested in a React Native component library called UI Kitten. It's the most well designed and comprehensive component library I've seen for React Native.
So, today, I'm going to try to do three things:
- Get UI Kitten working in an Expo app
- See if UI Kitten works well on the web
- Test accessibility of UI Kitten and Expo for the Web
Using the UI Kitten React Native Component Library
First, lets get a sample Kitten UI application up and running
npx react-native init uiKittenStart --template @ui-kitten/template-ts
cd uiKittenStart
yarn start
npx react-native run-ios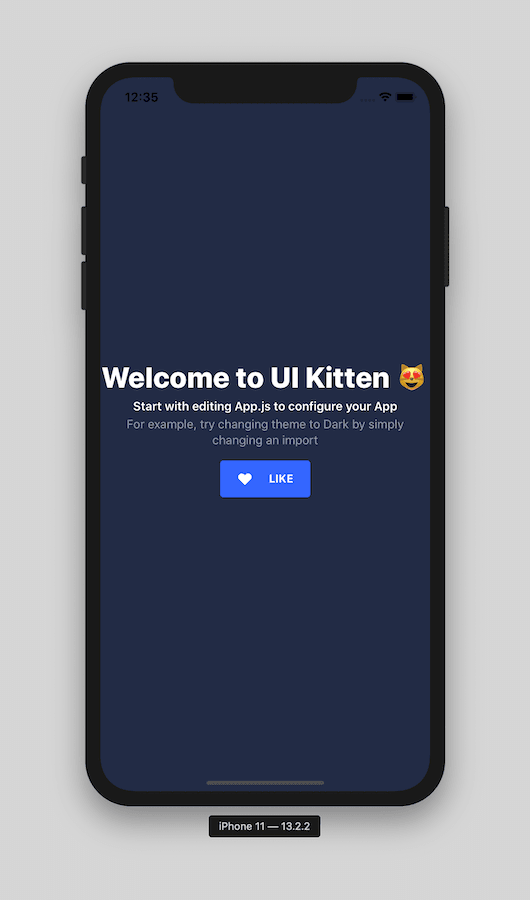
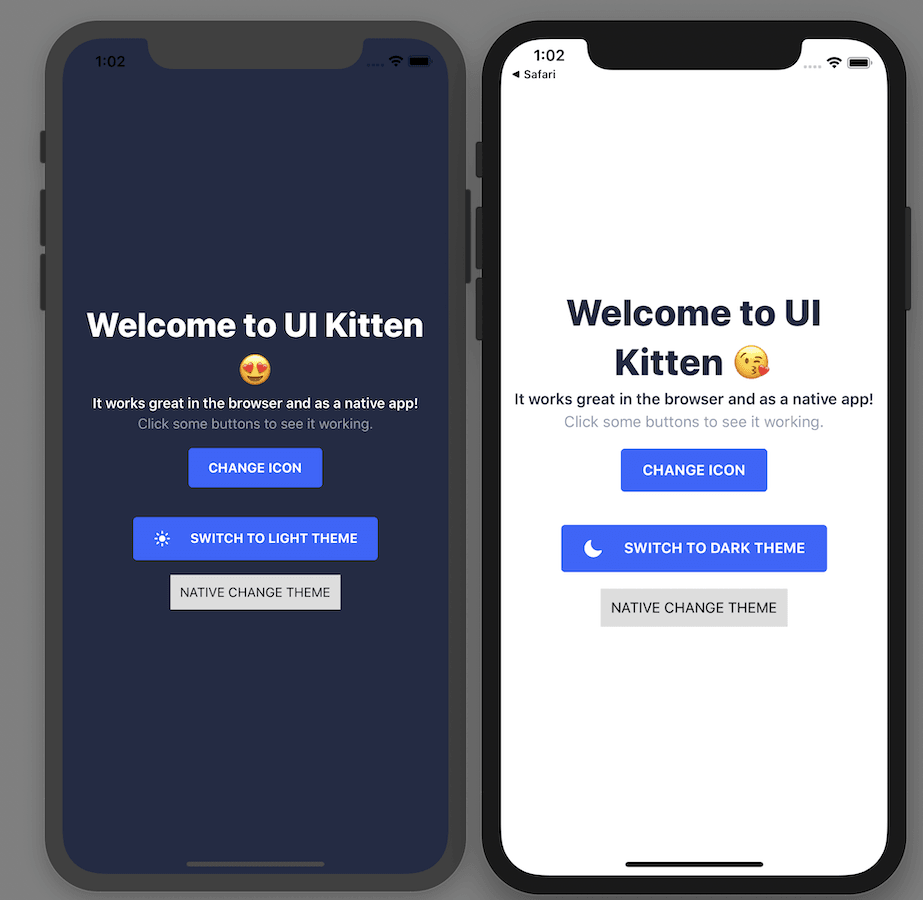
With just a tiny bit of code, we have a React Native app with beautiful styling.
Developing React Native Apps with Expo
Now, let's get an Expo based React Native app up and running.
npm install expo-cli --global
expo init uiKittenStartExpo
cd uiKittenStartExpo
expo start
When Expo starts, it will open a web page in your default browser. In the control panel, you can click the "Run on iOS Simulator" or "Run on Android device/emulator" buttons or you can scan the QR code to get the app running directly on your device(s)
The default Expo app is pretty boring. However, just making some quick changes in your code shows how powerful it is. Instantly, all connected devices are updated.
UI Kitten Running in an Expo App
To get UI Kitten working in your Expo app, you need to install a few dependencies:
expo install @ui-kitten/eva-icons @eva-design/eva @ui-kitten/components react-native-svgNow, paste this code into your Expo project:
import React, { useState } from "react";
import {
AccessibilityRole,
ImageProps,
ImageStyle,
StyleSheet,
TouchableOpacity,
View,
Text as RNText,
} from "react-native";
import {
ApplicationProvider,
Button,
Icon,
IconRegistry,
Layout,
Text,
} from "@ui-kitten/components";
import { EvaIconsPack } from "@ui-kitten/eva-icons";
import { mapping, light, dark } from "@eva-design/eva";
const heartIcons = ["😻", "💖", "😍", "🥰", "😍", "💝", "😘", "💓", "💕", "🐱"];
const themes = {
light: {
theme: light,
icon: "sun",
text: "LIGHT",
},
dark: {
theme: dark,
icon: "moon",
text: "DARK",
},
};
type IconProps = {
name: string;
style?: ImageStyle;
};
type CustomButtonWithIconProps = {
accessibilityRole: AccessibilityRole;
accessibilityLabel: string;
icon: string;
iconStyle?: ImageStyle;
onPress: () => void;
text: string;
style: any;
};
const renderIcon = ({ name, style }: IconProps) => (
<Icon {...style} name={name} />
);
const CustomButtonWithIcon = ({
accessibilityRole,
accessibilityLabel,
icon,
iconStyle,
onPress,
text,
style,
}: CustomButtonWithIconProps) => {
const ButtonIcon = () => renderIcon({ name: icon, style: iconStyle });
return (
<Button
style={style}
icon={ButtonIcon}
onPress={onPress}
accessibilityRole={accessibilityRole}
accessibilityLabel={accessibilityLabel}
>
{text}
</Button>
);
};
const App = (): React.ReactFragment => {
const [icon, setIcon] = useState(heartIcons[0]);
const [themeName, setThemeName] = useState("light");
const theme = themes[themeName].theme;
const changeIcon = () => {
const index = Math.floor(Math.random() * heartIcons.length);
setIcon(heartIcons[index]);
};
const changeTheme = () => {
setThemeName(themeName === "light" ? "dark" : "light");
};
const { text: themeButtonText, icon: themeButtonIcon } =
themeName === "light" ? themes.dark : themes.light;
return (
<>
<IconRegistry icons={EvaIconsPack} />
<ApplicationProvider mapping={mapping} theme={theme}>
<Layout style={styles.container}>
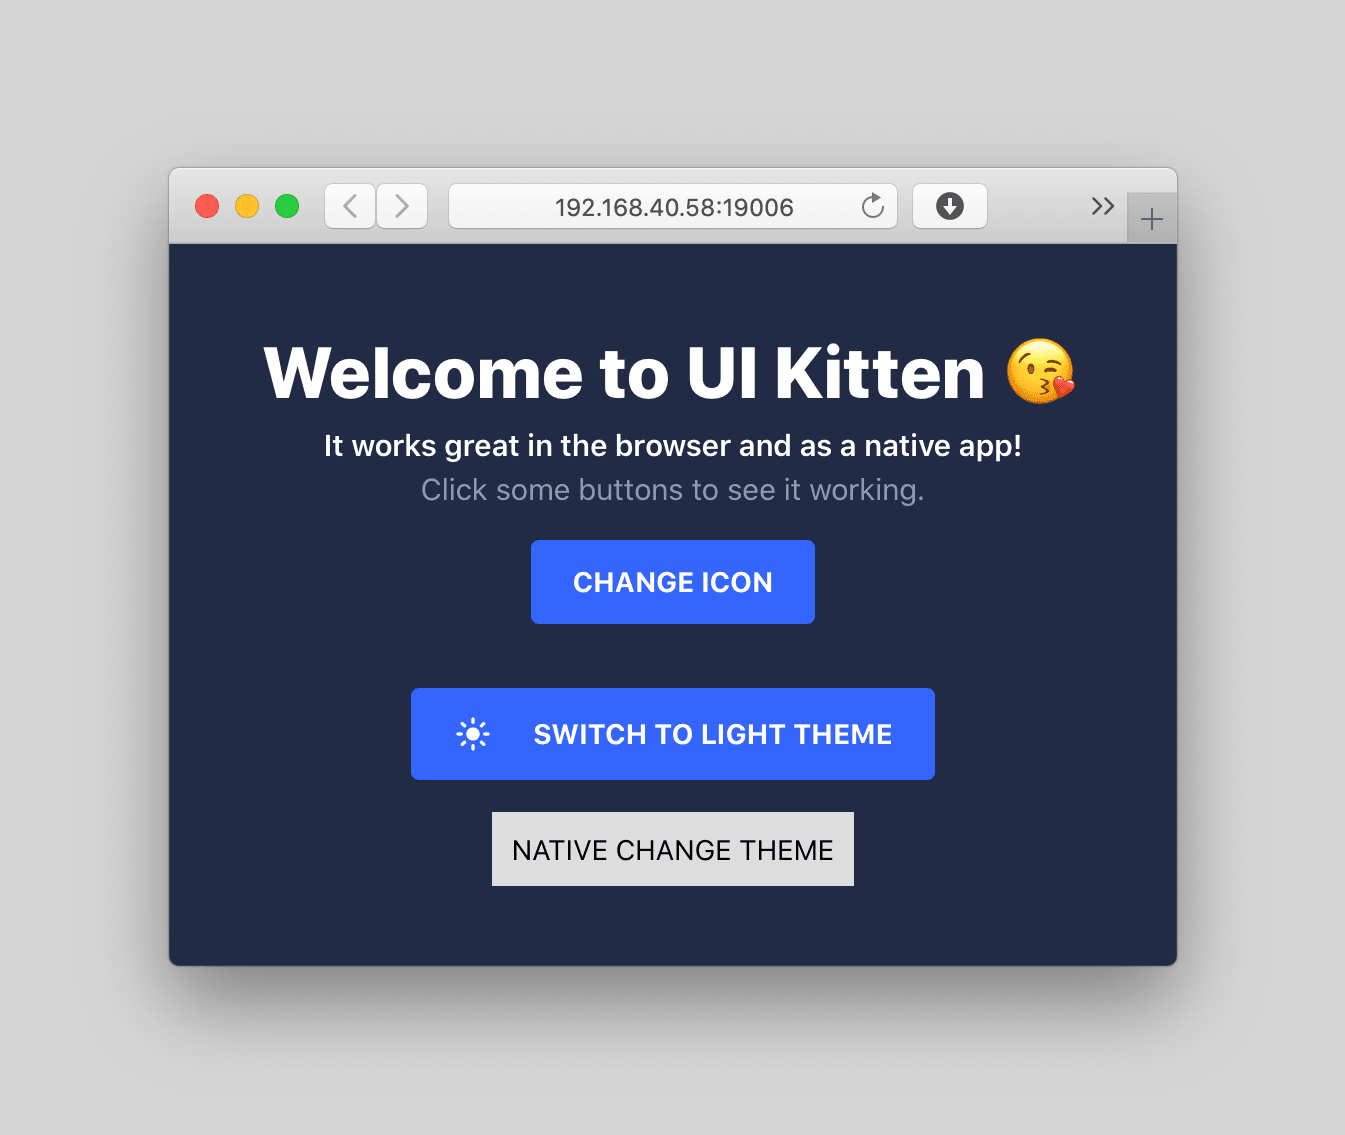
<Text style={styles.text} category="h1">
Welcome to UI Kitten {icon}
</Text>
<Text style={styles.text} category="s1">
It works great in the browser and as a native app!
</Text>
<Text style={styles.text} appearance="hint">
Click some buttons to see it working.
</Text>
<Button
accessibilityRole="button"
accessibilityLabel="Change Icon"
style={styles.iconButton}
onPress={changeIcon}
>
CHANGE ICON
</Button>
<CustomButtonWithIcon
accessibilityRole="button"
accessibilityLabel="UI Kitten Change Theme"
style={styles.iconButton}
text={`SWITCH TO ${themeButtonText} THEME`}
icon={themeButtonIcon}
onPress={changeTheme}
iconStyle={{ tintColor: "white" }}
/>
<TouchableOpacity
accessibilityRole="button"
accessibilityLabel="Native Change Theme"
onPress={changeTheme}
>
<View style={styles.nativeButton}>
<RNText>NATIVE CHANGE THEME</RNText>
</View>
</TouchableOpacity>
</Layout>
</ApplicationProvider>
</>
);
};
const styles = StyleSheet.create({
container: {
flex: 1,
justifyContent: "center",
alignItems: "center",
paddingHorizontal: 10,
},
text: {
textAlign: "center",
},
iconButton: {
marginVertical: 16,
},
nativeButton: {
alignItems: "center",
backgroundColor: "#DDDDDD",
padding: 10,
},
});
export default App;
💥 Just like that, you have a nicely designed app running in Expo and instanly updating across as many devices as you have connected.
React Native Apps Running in a Browser
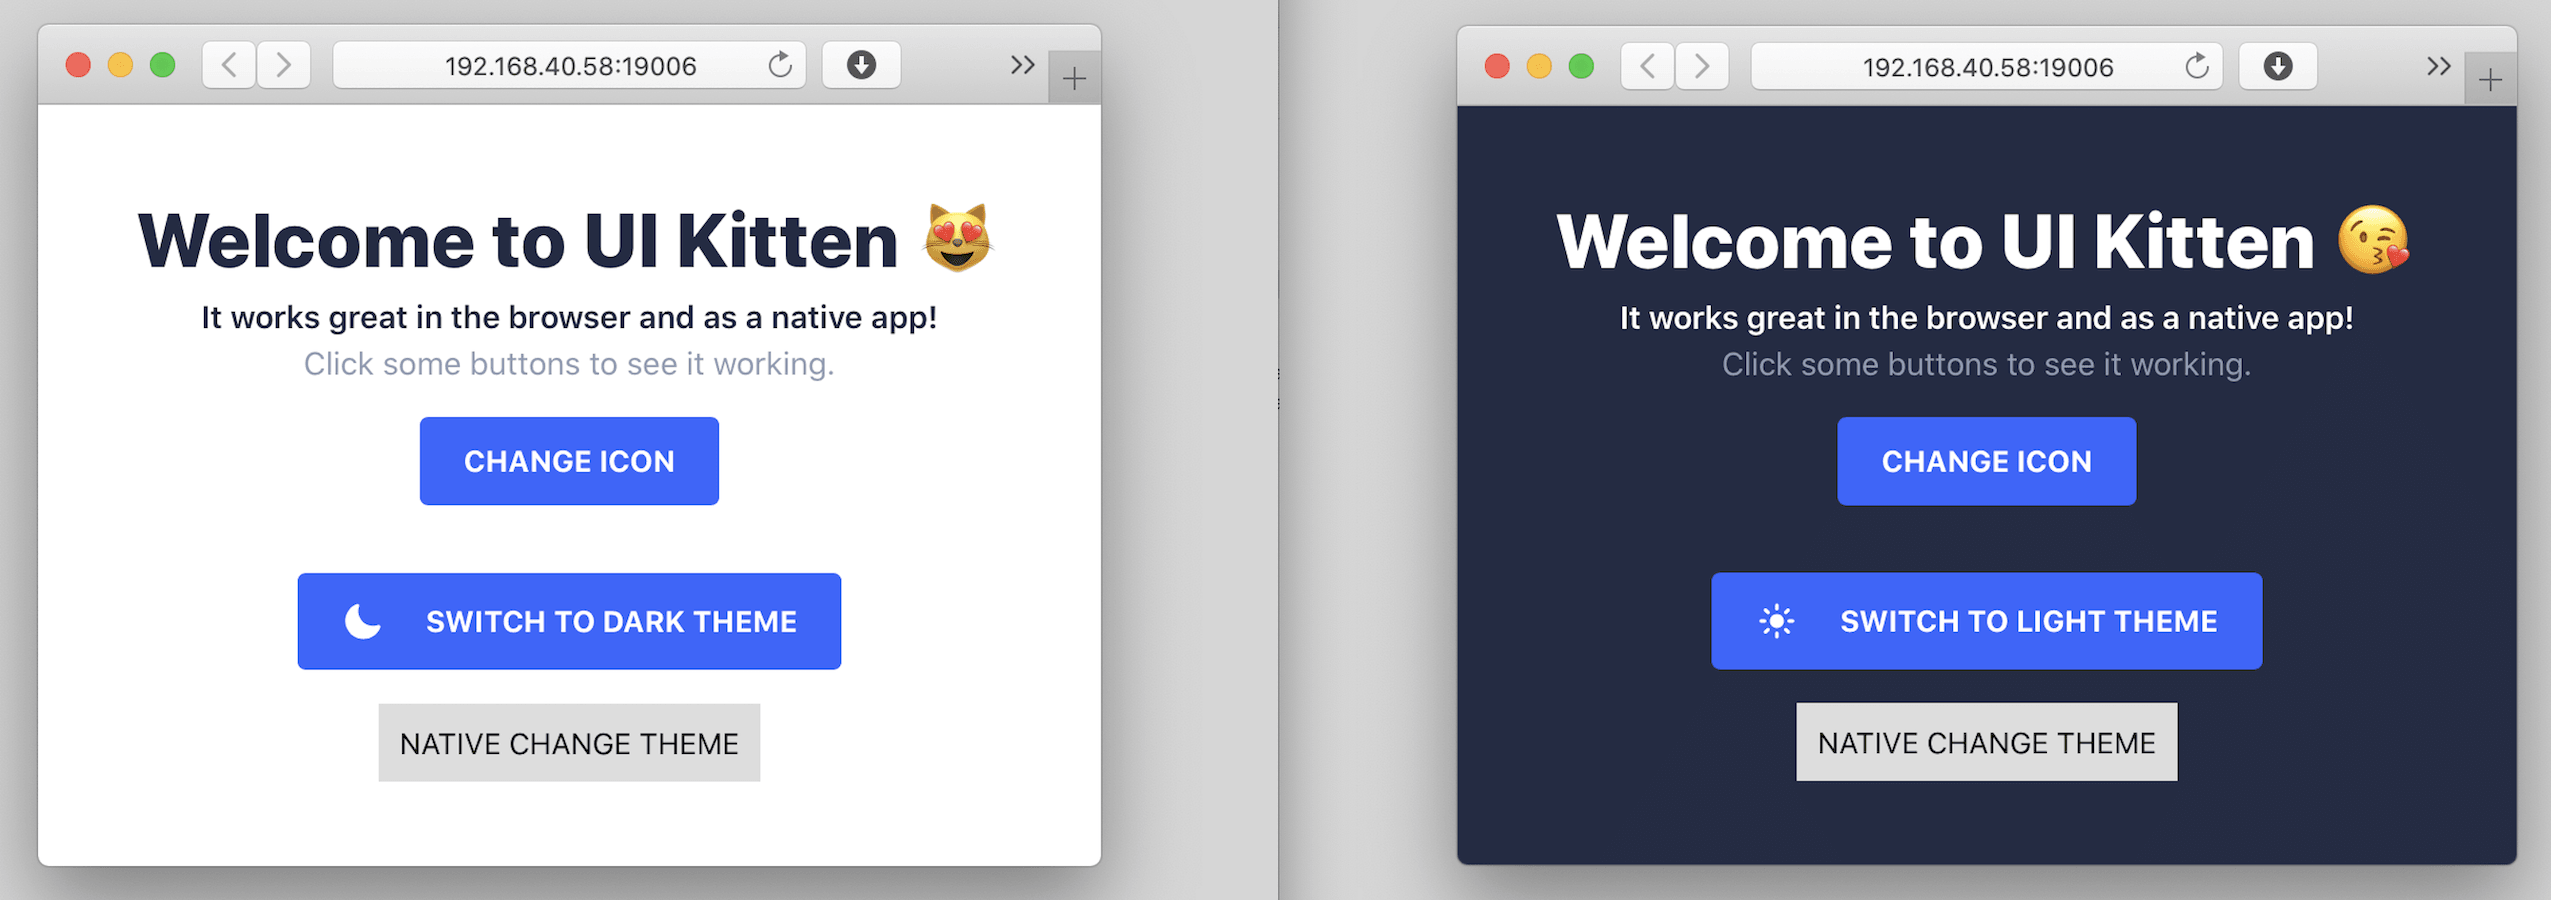
To get this React Native app running in a browser, you can open another Expo bundler that will use webpack to convert your React Native code into HTML.
yarn webNow, the app will open in a browser. Instantly, you have a web app that runs in Chrome, Internet Explore, Firefox, Safara, Opera, etc.
Accessibility in Browser for React Native Apps
By default, your React Native app running in the browser will not be accessible. Because the React Native primitives are not mapped to standard HTML elements like buttons, the rendered HTML will not really be accessible. Instead, a "button" will be a div.
To ensure differently abled people are able to use your app in the browser, you'll need to use the built-in React Native Accessibility features. In our example, you just have to ensure the UI Kitten <Button> elements have additional properties that will be mapped to ARIA accessibility attributes.
<Button
  accessibilityRole="button"
  accessibilityLabel="Change Icon"
  ...
>
Thanks to All the Open Source Contributors
It's really incredible that with just a few lines of code and some imports, you can create cross-platform or "Universal" apps just using React Native code.
I want to thank everyone in the community that has made this possible, specifically:
- Nicolas Gallagher for React Native for Web
- Expo for this amazing tool and Evan Bacon for sharing all his knowledge.
- Akveo for creating and maintaining UI Kitten